Manual Setup |
  
|
Manual Setup |
|
HIPAA Claim Master can import all the fields on the HCFA-1500 or the UB-04 forms. You might not want to import every field, and you will have the option to select the fields accordingly. However, we recommend you select all fields to capture all data.
Note: Ensure you have Set Up Your Database Connection and Created Your Tables before continuing.
Follow the instructions below to start manually setting up the database:

The "Manual Setup" box.
See the details of the properties to be filled out for each field:
oDatabase Type Click the drop-down menu to select your Database type.

The "Database Type" drop-down menu.
oDatabase Server Name Enter the name or IP address of your SQL Server (e.g., DBServer01 or 192.168.1.10) or just .\ for the default instance. If connecting via ODBC, enter the Data Source Name (DSN) configured in Windows ODBC settings.
oDatabase Enter the database name.
oUsername & Password Fields Depending on the selected database type, you may or may not need to enter a username and password.
oSQL Server Authentication
§Requires a username and password to be entered and stored explicitly.
§These credentials are managed by SQL Server, not Windows.
§The credentials are saved in the connection settings or connection string.
oWindows Authentication
§Does not require entering a username and password manually.
§Uses the credentials of the currently logged-in Windows user.
§SQL Server trusts the Windows account through Active Directory (or local security).
At this point, select the "Test Connection" button; if successful, the following window will open and the "Checked" box will automatically be checked-marked.

Message pop-up if the connection was established successfully.
If it is unsuccessful, you would need to review your credentials.
oYou can create the tables through a separate screen This hyperlink will open a separate window where you can create the tables.

This window will allow users to create their database tables.
Each tab contains a script to create its corresponding table. Click the Execute Script button on each tab to create the table in your database.
oClaim Status Header Table
oClaim Status Detail Table
oStored Patient Table
oStored Provider Table
oStored Receiver Table
oCompany Setup Table
After successfully testing the connection and creating the tables, you must choose which data fields will be stored in the database.

Choose the fields to include in your database tables.
1.Choose fields to be exported by selecting checkboxes in front of the fields in the following tables:
The list displays all fields available for inclusion in your database tables. You can choose to:
·Select All: Click the Select All button to include every field in the tables.
·Select Individually: Manually check the boxes next to the specific fields you wish to include.
Once youve made your selections:
Click "Test Configuration" to verify that the selected fields were successfully added to the database tables.
Then click "Save Configuration" to finalize and store your field setup.
Tip: We recommend to select all fields. This makes it possible to reassemble all the information in the EDI file and create the image of the Claim Master.
Tip: Sometimes it might be necessary to rename a field or fields. Some legacy database want upper case only or lower case only field names. The HIPAA Claim Master allows you to rename any field in any table. Click twice (not double-click) on a field and you are in "Edit" mode.
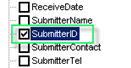 Changed to
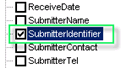
Editing a field name.
The field selection list in "Edit" Mode
1.After selecting your fields, click "Test Configuration." The program will review each table and confirm whether the selected fields are present in the database.

The "Test Configuration" button.
2.You should receive a message like this. Click "OK."
3.Once the field configuration has passed validation, you can proceed to save it. Click the "Save Field Configuration" button to store your selections.

The "Save Field Configuration" button.
Troubleshooting Data Fields
Once you have made your selection or selected all you have to test your setup. Click on the "Test Configuration" button.
If the program finds errors, the Error screen will come up and tell you exactly which fields caused errors.

The error window.
In the example shown, the database is missing several required fields. To resolve this, click the Uncheck Fields in Error button. This will automatically deselect all fields that caused errors so they will be excluded from the data export process.
Test the configuration again and you should get the success message. Click on the "Save Field Configuration" button.