Creating Image Files from EDI Files |
  
|
Creating Image Files from EDI Files |
|
You can create image files manually or automatically using the command line arguments and Windows Scheduler. See more in Using Command Line Arguments (CLI). Follow the steps below to create image files from EDI files manually:
1.Go to File > Open for a single file or to File > Open Directory for multiple files as seen below (see Processing an Implementation Acknowledgment and Processing an Entire Directory.)

The "Open" and "Open Directory" options are under the "File" tab on the main menu.
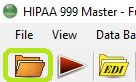
The "Open File" icon is in the Taskbar.
2.Select the "Image File" option as the "Output Mode."

The "Image File" mode.
3.Click the "Run" button.

The "Run" button options in the main window.
4.The "Processing Results" window will pop-up and display the report. You can find the TIFF or PDF files in the specified folder.

The "Processing Results" window.

The "Image File Output" folder is where images can be found.