Defining Auto-Processing Options |
  
|
Defining Auto-Processing Options |
|
With EDI Exchange, you can instruct the application on what to do after analyzing and decrypting the received files in the Inbox Manager. Auto-processing enables you to combine and run multiple fulfillment steps, such as exporting, saving, and printing. These options are important for the handover from EDI Exchange to the hosting of the HIPAAsuite application.
To configure the Auto-Processing options, follow the steps below.
1.Go to EDI Exchange > Autoprocess Setup in the main menu window.

The "Autoprocess Setup" option is under the "EDI Exchange" tab.
The following window will open if you open EDI Exchange::

The "Automatic Processing Options" window in HIPAA Claim Master.
The following window will open if you open EDI Exchange from HIPAA Enrollment Master:

The "Automatic Processing Options" window in HIPAA Enrollment Master.
2.Though the function of the "Automatic Processing Options" window for each application is the same, they may look a little different. See the details for each below:
oCheck FTP servers for new files and place them into Inbox If checked, EDI Exchange will automatically look for new files for all Trading Partners that have an FTP connection set up, then place all the waiting files into the inbox.
oExport in Database If checked, the module exports new files to the database.
oPrint If checked, the module prints files using the selected printer.
oSave to This section allows you to save processed files in one of these formats: Image, Excel, or ASCII.
3.Within the options window, you can check the boxes to determine what you want done with each file.
4.Once you are done, click "Save" to apply the changes. If you want to start your selection over, you may click "Clear Options" to un-check all options.
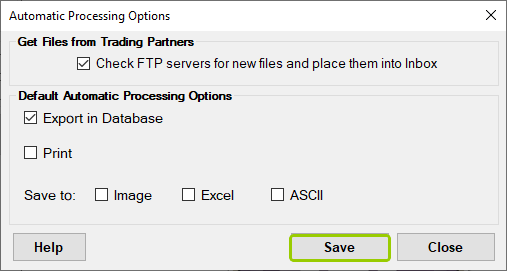

The "Save" button in both windows.
Once you have saved the auto-processing options, the files will be analyzed and processed according to the defined settings.