Application Setup |
  
|
Application Setup |
|
1.To configure your processing option, go to Setup > Options in the main menu window or the "Options" button in the task menu.

The "Setup" menu and "Options" button.
2.The following screen will appear.

The "Application Setup" window.
Update
The next item determines whether the application on start-up looks for the existence of updates and newer version. Some companies have a strict policy that all updates have to be thoroughly tested before they can be implemented and users should not be faced with an option of update the application. For this case, we have the below check mark:

Set if you want to suppress update messages.
Log all File Processing
Checking Always Write to Log box ensures that all process messages are written to the log file regardless whether the application is run through the command line or the user interface. The HIPAA Claim Payment Master keeps track of all of the steps in processing EDI files. When the box is checked, processing steps are saved in the log.

The log setting determines whether process messages will be saved to the log file at all times.
Display Option
The following option is available:
·One Page per Claim Select this option to put the image of a single claim on one page or a single image file. In the following image, you can see the second claim of a payment. The header information is repeated on each page. If this option is selected, then you can specify the rule for giving the names to your image files (see Doing Image Setup, "Individual Image Filename" options).
·One Claim after Another - Select this option to list the claims one after the other. In the following image, you can see that one claim is displayed after the other.

Set the display to either one page per claim or one claim after another.
Document Color
The next item on the setup screen determines whether the background and labels on the printable form are in red to contrast them with the font color of black. When printing the forms to paper on a color printer you can save money and resources by choosing black. Otherwise it makes the forms much easier to read when you have background and labels in red.

Set the color of document background and labels.
Processed Files
The first setting concerns the handling of EDI files after processing. In order to avoid the duplicate processing of EDI files, we recommend that you move files after processing into an archive folder so that they are not processed multiple times. When working with copies of files, you can choose to delete the copies after processing. Always ensure that the original files are saved in a secure location. EDI files are important business documents and you want to make sure that you can access them at a later point in time for trouble shooting, audits, and other reasons. Leave in Place means the file remains in its original location and is not moved or deleted after processing.

Determining the handling of processed files.
If you use EDI Exchange, the Processed File folder is determined by the folder schema of EDI Exchange. Each trading partner has their own processed files folder. If you do not use EDI Exchange, browse to the folder where your files are stored and select it as the location.
Outbox Directory Path
Before creating 835 files, select the folder where the output file will be saved.

Outbox Directory Path.
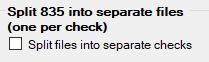
Split 835 into separate files (one per check)
The next item in this setup process is prompting us on whether or not to split 835 into separate files via a checkbox.
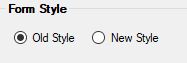
Form Style
The following option is available:
·Old Style Select this option to have familiarity with that form style (if you are a long time user).
·New Style - Select this option to be up to date with current styles and to have an enhanced experience.
Excel Files
Before creating excel files, select the folder where the output file will be saved.

EDI Creation
The last item on the setup screen prompts us to select how the EDI files should be created. There are two parts to this item which are the checkbox for one claim per payment and the box to fill out for max claim count per file.
